The Quest 2 has brought upon a new era of creators! If you've ever seen mixed reality or avatar VR footage out there, and have always wanted to create your own - look no further! We'll show you how to get it all working in this guide.
There are two different methods depending on what hardware you have, and what you want to achieve, but both methods will require our free app on Steam which you can find here.
First, a choose your own adventure to shuttle you into the correct section of this post:
-Do you want to create content in mixed reality (physical camera), but have a lower end PC or laptop? Use the Quest on PC beta on our Steam app and make sure you also download our companion Quest app on App Lab.
-Do you want to create content in mixed reality (physical camera) and have a pretty decent gaming PC? You can use either Quest on PC for Quest native games, or the SteamVR method for Steam games using the PCVR compositor of the LIV Steam app!
-Do you want to create content as an avatar/v-tuber? Use the SteamVR method for Steam games, and the PCVR compositor of the LIV Steam app. Currently we do not have avatar functionality for Quest native games.
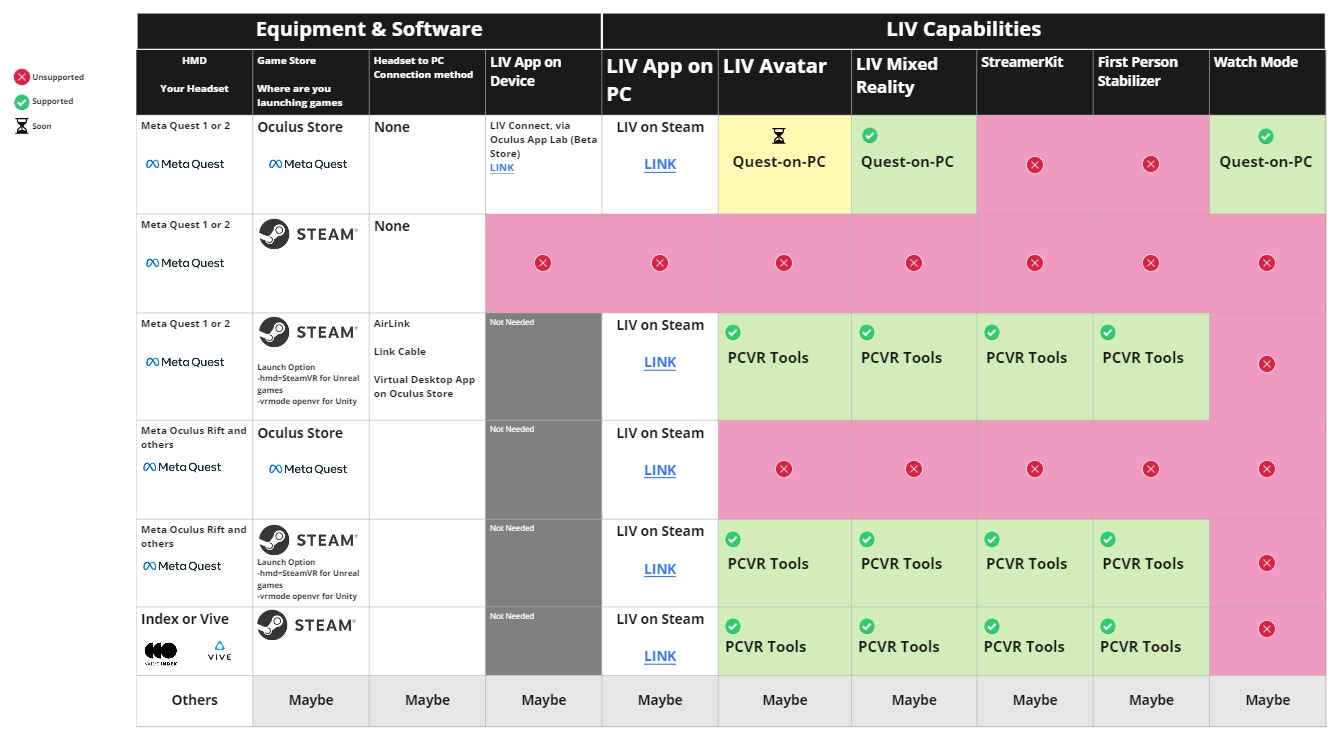
You can also use this handy chart to determine what you can and can't do:
The first method: Quest on PC
What is Quest on PC, and what kind of hardware do I need?
Quest-on-PC is our beta capture that allows you to record Quest 1 and Quest 2 games wirelessly and capture yourself in mixed reality! For Quest-on-PC, you don't need a powerful computer! You just need your Quest, a Windows 10 machine (even a laptop works), and a camera. (A 5Ghz WiFi connection is also recommended). Find out which cameras work with Quest-on-PC here.
What games work with Quest on PC?
Not all games will work in mixed reality, the developer needs to have added Oculus MRC capability to their game first (so if you find an unsupported game, let them know you'd love LIV support on their socials!) In the meantime, you can find our Quest supported games list here.
What software do I need?
-Our free LIV Steam app
-Our free companion Quest app, LIV Connect
Now let's show you how to get it all set up!
1. First make sure the LIV Steam app and LIV Connect Quest app have been downloaded and installed on your devices respectively.
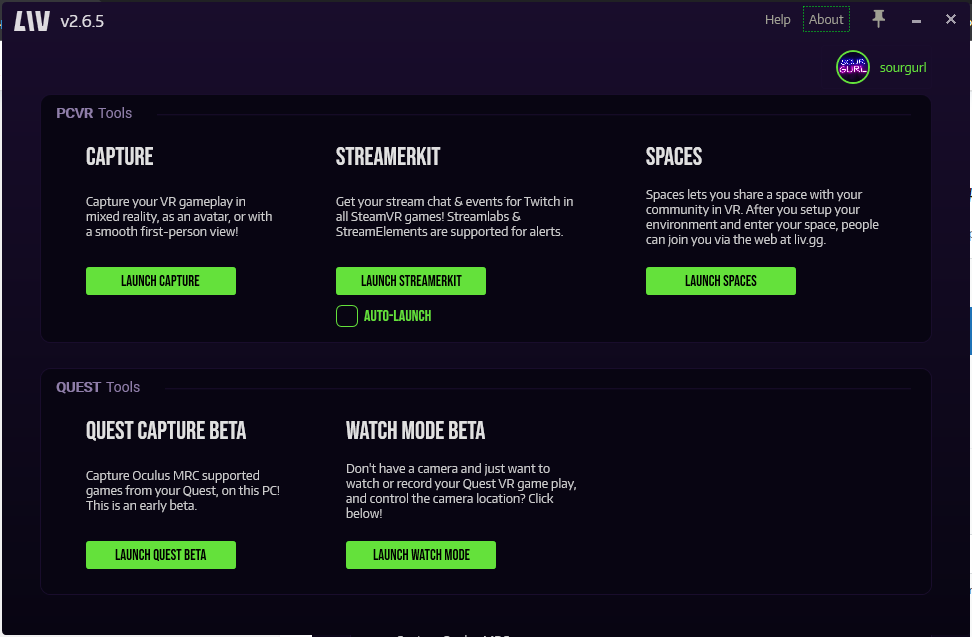
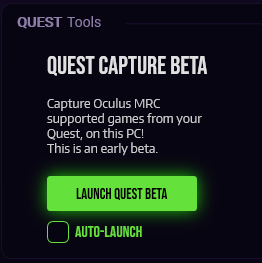
2. Start by launching the Steam app and selecting 'Launch Quest Beta'
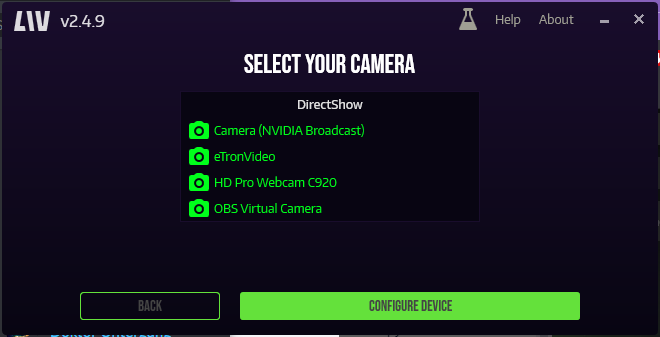
3. Select your camera, then click 'configure device'
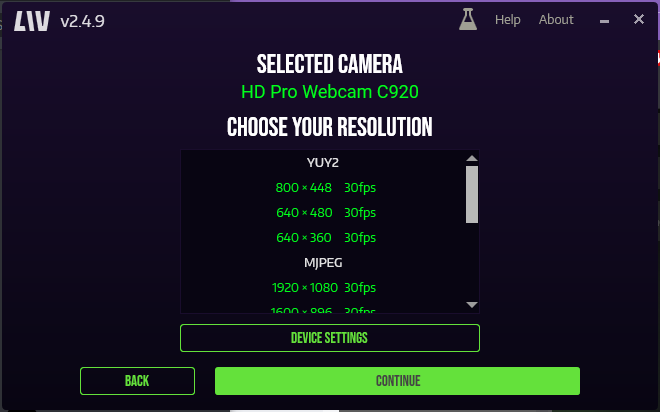
4. Select your camera's resolution and FPS, then click 'continue'
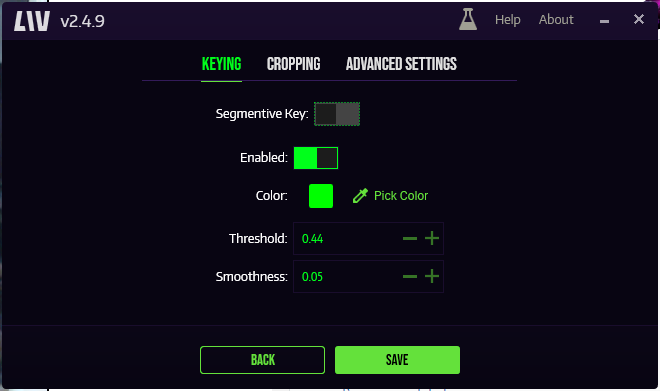
5. Next you can use these sections to adjust your chroma keying (for green screen), crop your camera, or test out our 'segmentive key' which is an AI that automatically removes your background from you (thereby eliminating the need for a green screen- depending on how much of a stickler for quality you are). When you are done with your preferences, click 'save'.
6. Launch LIV Connect on your Quest

7. Wait for it to connect to continue on with calibration.

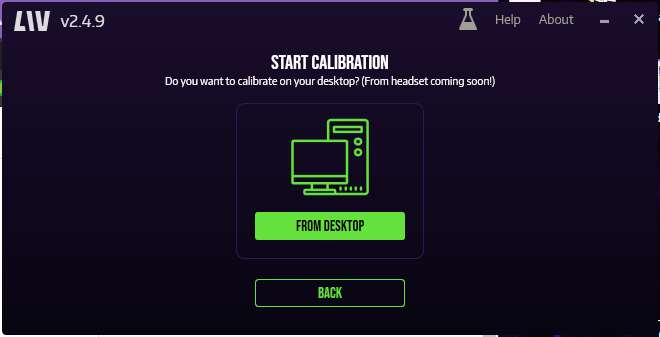
8. On your desktop, you will see a start calibration box - currently you can only calibrate from desktop but we are experimenting with in headset ways soon! Click 'From Desktop' to continue.
9. Bring your controller all the way up to the lens of the camera as showcased below, then press Trigger. (You can use the trigger or the ring here as long as you are using the same thing on each + sign

10. For step 2 and 3, move as far back into your play space as you can,m then repeat the clicks in each corner using the same alignment logic.

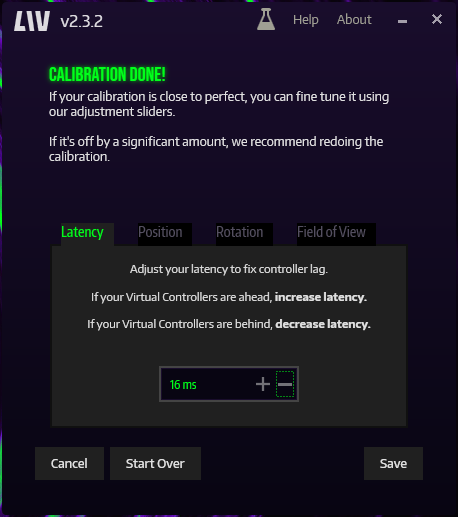
11. Make any adjustments you need such as latency (move your arms up and down, if the controllers 'lag' behind you can adjust the ms to match better), position, rotation, and field of view. Click 'save' once you are happy with your settings.
12. Quit out of LIV Connect (on your Quest - keep the Steam app running). Launch an MRC supported title, capture the LIV Output window on your desktop using a recording software like SLOBS or OBS, and you're all set!
The second method: PCVR on your Quest
What's different between this method and Quest on PC, and what hardware do I need?
This method allows you to play SteamVR games on your Quest, therefore allowing you to use avatars, chat overlays, and much more. Your computer will need to be 'VR Ready' but also keep in mind with LIV running, essentially it will be running that VR game twice. Once through Steam, and again through LIV.
What games work with this method?
Not all games will work in mixed reality, the game's developer would need to add our SDK to their game in order for it to work (so if you find an unsupported game, let them know you'd love LIV support on their socials!). In the meantime, you can find our full list of Steam supported games here.
What software do I need?
-SteamVR and make sure the LIV Steam VR Driver is installed
-Our LIV Steam app
-The Oculus PC/desktop app
-Airlink (a feature that automatically comes with your Quest) or alternatively, a program like Virtual Desktop
Now let's show you how to get it all set up!
For the sake of this tutorial (and because it's free) we're going to show you the airlink method of connecting your Quest to your PC, though we have a Virtual Desktop guide you can also view here.
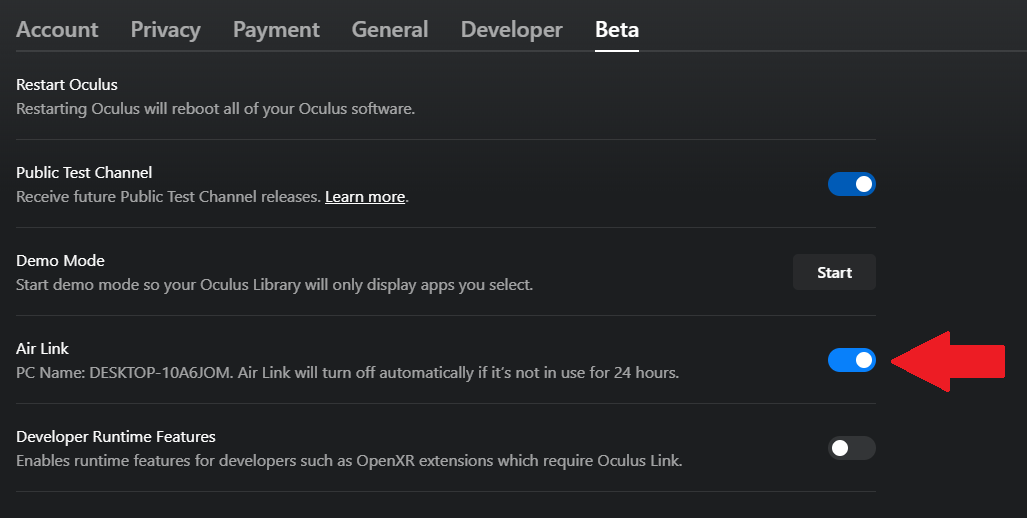
1. First go to the Oculus desktop app, and go to Settings → Beta → and make sure Air Link is toggled.
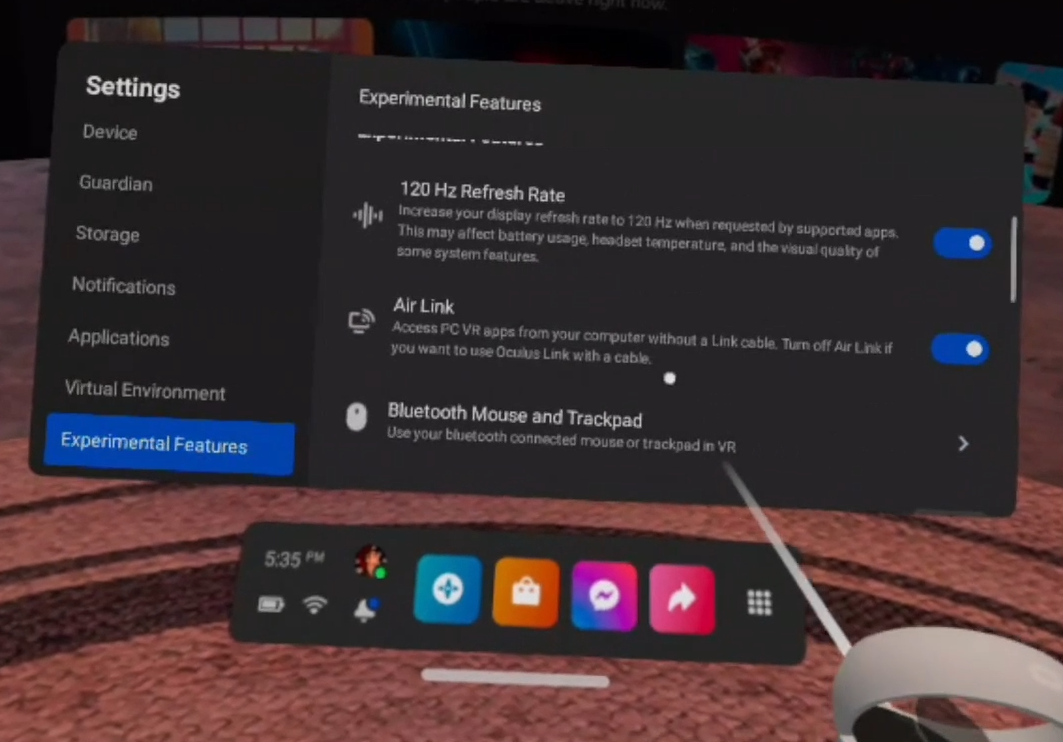
2. In your headset, go to quick settings ->then settings (on the top right) -> experimental features -> find airlink (and toggle it on)
3. This may bring you back to your quick settings in which you will need to click on airlink to activate it, then select your PC, then click 'launch'
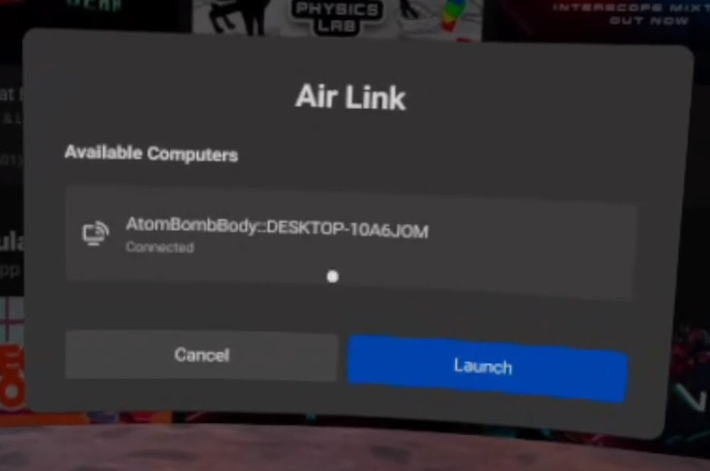
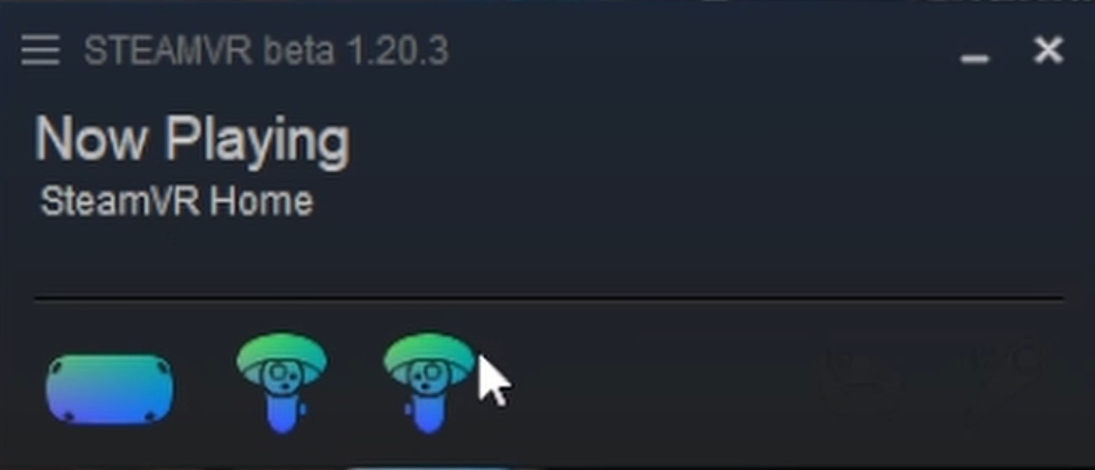
4. In the new dashboard, click on a button that says 'library' and select 'Steam VR'. You should then load into the normal Steam VR home. On the little SteamVR popup window, you should see your Quest 2 and controllers connected.
5. Go back to your physical desktop, launch LIV on Steam, then under 'PCVR Tools' click the green 'Launch Capture' button.

6. Set up your camera, calibrate it, adjust the camera settings to your liking etc. Then make sure to launch the supported game of your choosing from your desktop by using the 'auto' tab on LIV and selecting it from the list, then 'sync and launch'. Capture the LIV Output using a recording software like SLOBS or OBS, and you're all set!

If you run into any issues, feel free to send a support ticket here or join our Discord community!
LIV on, creators!