It's still too good to be true, isn't it?
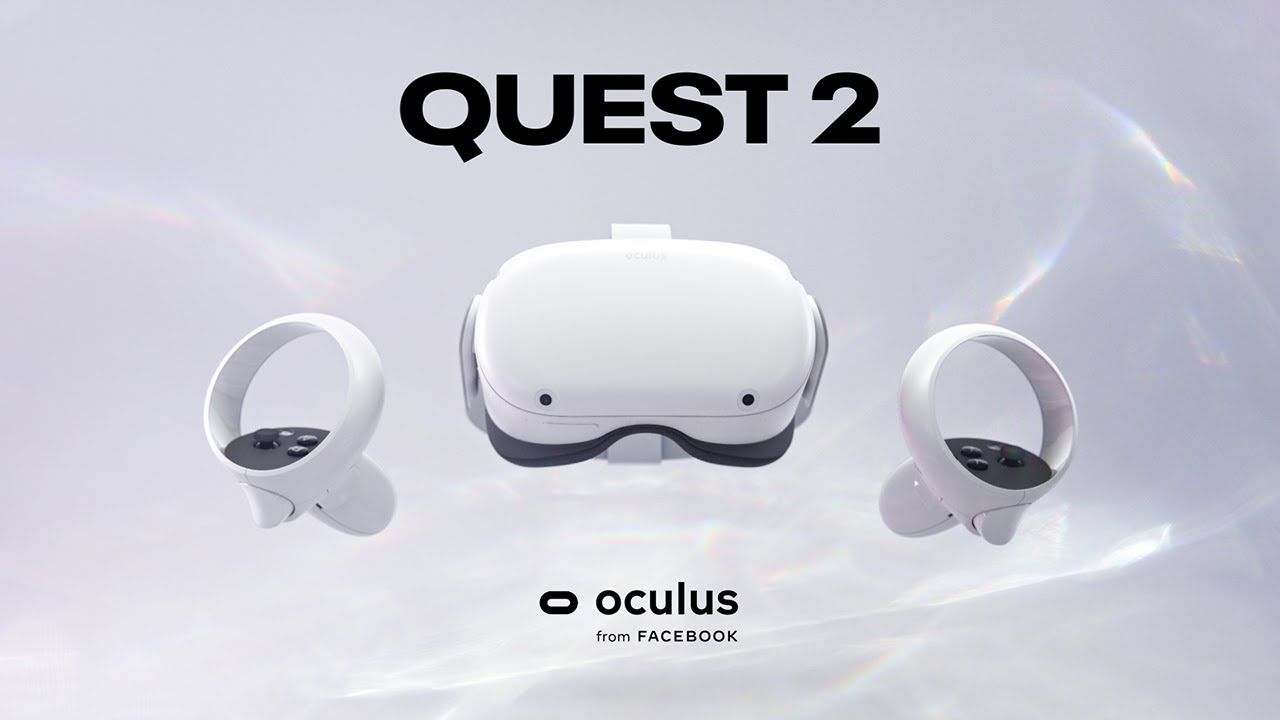
We totally get it! With the launch of the Oculus Quest 2 headset only a few days away, no one is more excited than we are. And what’s not to be excited about?
Packing a 6GB RAM, 72Hz fast switch LCD (with 90hz coming soon), and a couple of other impressive features - all for a ridiculously cheap price tag of $299 - the Quest 2 intends to revolutionize virtual reality as we know it.
In an attempt to improve on the original Quest, Facebook revamped certain aspects of this VR headset, and in some instances, it swapped them out altogether. You can get a good idea of what we’re talking about by looking at the Oculus Quest 2 new controllers. And this is only a change that’s skin deep. Others run as deep as the Quest native interface and central programming.
But just how drastic would these improvements be?
With several integral solutions like the Oculus Link and its casting tools still being in infancy, you might be wondering if you can record player-favorite games like Beat Saber on your Oculus Quest 2.
Well, guess what? You absolutely can!
This article will walk you through all the steps required to connect your Oculus Quest 2 headset to your gaming PC and record yourself slashing away on Beat Saber.
- Connecting your Oculus Quest 2 with your PC
- Downloading what you’ll need
- Setting up LIV for Mixed Reality Capture
Ready? Great. Let’s dive into it!

Connecting your Oculus Quest 2 with your gaming PC: two methods
Like its predecessor, the Quest 2 can run certain games natively on its interface. However, unlike the original Quest, this VR headset can expect higher resolutions and speeds for certain games soon - like the incredible 90Hz we mentioned earlier.
But if you don’t want to be stuck playing mobile games on your Q2 forever, you may eventually want to link up your headset to your PC. Especially if you'd like to capture the VR games available on PC - or simply play them.
Connecting your Oculus Quest 2 to your gaming PC is a simple task and you can easily get it done in under three minutes using any of the two methods currently available.
The first method involves you connecting your headset to your computer with a USB-C cable.
We recommend that you opt for the official Quest 2 link cable being sold by Facebook. This is because it has high bandwidth which enables faster data transfer while keeping your Quest 2 adequately charged.
Next, open the Oculus App on your PC. If you haven’t done so already, you can download it here. You’ll need it.
After the program has booted up, select 'Devices' from the menu that's aligned to the left side of your screen. Then, plug in your Quest 2 to your PC using the USB cable.
At this stage, a window should pop up in your headset asking if you want to "Allow Oculus Link to connect?” Click yes.
And with that, you have gained access to the entire library of games on Oculus Link. Yeah, it’s that simple. It’s important to note that once you have connected your headset with the cable, it’s treated just like any other PC VR Oculus device, both in Steam and everywhere else.
The second method, cable free method is called Virtual Desktop.
You'll need a dedicated 5GHz wifi connection. This solution works really well under stable connections.
To learn more about this method, feel free to watch this video.
Downloading What You’ll Need for Virtual Desktop
The next steps you’ll need to take are quite straightforward.
- First, download Steam on your PC. It’s one of the largest libraries of PC games and you can get it here.
- Now, install SteamVR inside Steam. To find it, simply search for ‘SteamVR’ in the store and install it on your computer.
- Next, you’ll want to have a VR capture solution. You can try LIV. It’s free, pretty easy to use, and doesn’t dumb down the resolution of your videos. If you want to read more about LIV, here's their official help center.
When it comes to VR capture, there are 3 ways you could go about recording yourself in your favorite games:
- Avatar Capture: Imagine if you could play Beat Saber dressed as your favorite anime character. No, we are not talking about cosplay. We mean literally taking on the skin of a virtual character and appearing as them in-game. With this method, you can film yourself as any avatar. And the best part? It requires no additional hardware. LIV currently supports .vrm and .avatar files, and you can look for VRoid created avatars, or find Avatars on www.modelsaber.com!

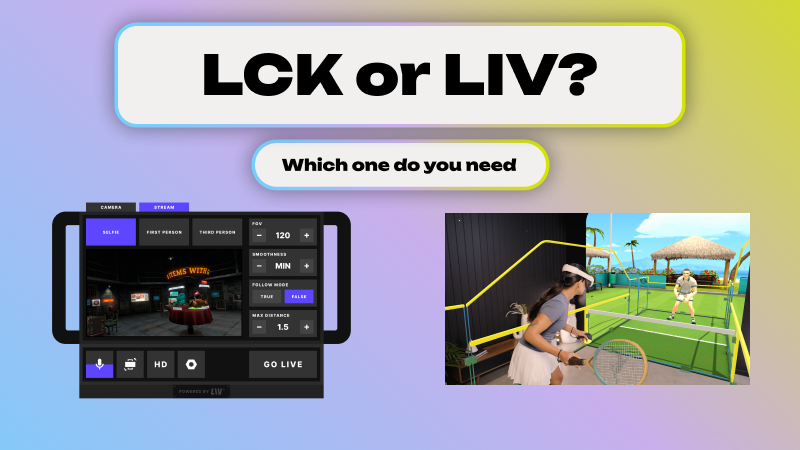
- Enhanced First Person Capture: Basically, FPC is all about recording gameplay footage the same way you the player sees it. If you want your audience to have an experience that’s closely tailored to yours, then this is the best option for you. But even while filming from the first person point of view, you can throw in additional smoothing and Field of View (FoV) options to make the experience less shaky and nauseating for your viewers.
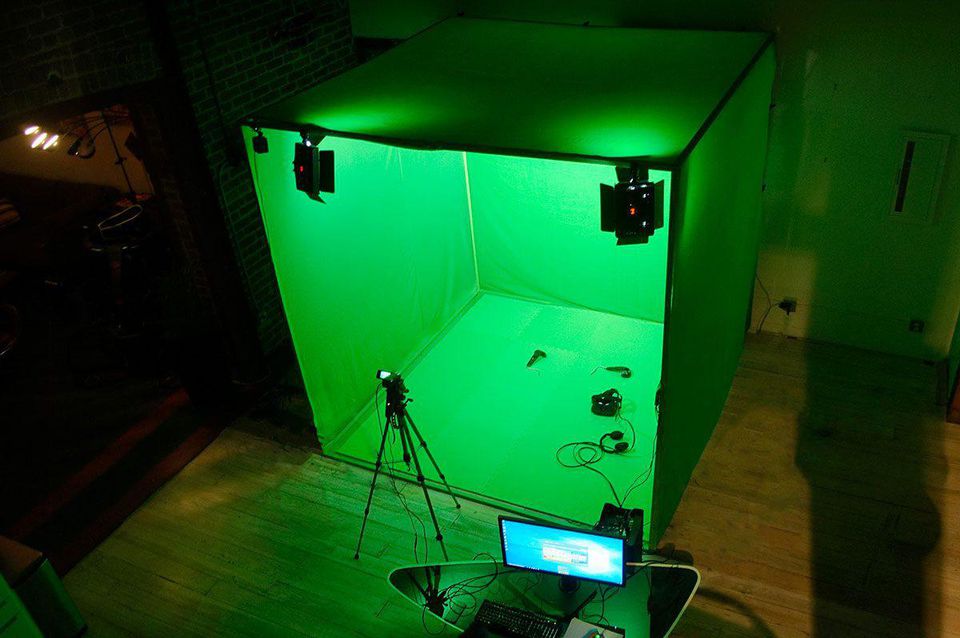
- Mixed Reality Capture: Mixed reality is all about filming your IRL body inside a virtual game with a real camera. Think of it as a mix ‘n’ match of two worlds, like many of the viral Beat Saber videos that you've seen on the internet.

(To achieve this effect, you’ll need a camera and a way to remove your background (you can easily do this with a green screen, Kinect, or LIV’s iOS app)
Whichever of these three methods you settle for, LIV is still your best bet. It’s quite honestly the complete package when it comes to VR capture and streaming tools. However, for the sake of this article, we’ll be focusing on how you can set LIV up for mixed reality capture.
Because let’s be honest… a real-life human body in Beat Saber? Who doesn’t want to see that?
Setting Up LIV (Mixed Reality Capture)
Before you can record Beat Saber in mixed reality on your Oculus Quest 2, there are four steps you’ll have to go through. For the official guide, you can head over to LIV's official documentation.
1. Creating Your Mixed Reality Camera Profile
- First you need to install the LIV virtual driver – do this, and restart SteamVR.
- To create a camera profile, first launch the compositor.
- Next, click on ‘Camera’ in the left tab and select the ‘Add Camera’ icon. It’s the one with a ‘+’ and a video camera.
- At this point, an additional window should pop up. Move over to ‘Type’ and click on the drop-down menu. Then, select the nature of the device you’d like to use to record - Video Camera, Kinect, or iOS (NDI).
- Under ‘Device’, select your camera or capture card. Their names should automatically appear as long as they are connected to your PC.
- Under ‘Mode’, select your desired resolution and frame rate.
- Then, name your profile and save it.
2. Preparing Your Calibration
In all honesty, calibrating your camera isn’t as technical as it sounds. It’s quite straightforward. But before you can pin your camera to one spot, there are few preliminary adjustments you should make.
- First, return to the ‘Camera’ tab and click on the 'Edit' button.
- Again, a new window should appear. This time, click on ‘Calibration’.
- Make your way over to the ‘Tracker’ field and select if you want your camera to be static or dynamic. If you opt for a camera that moves around, make sure to specify your tracker, otherwise pick "Static".
- Next, click on ‘Begin Calibration’ to start calibrating your camera.
- You’ll get a prompt asking if you want to calibrate from your headset or desktop. Choose whichever one that suits you, although I find calibrating from the headset is easier!
3. Calibrating Your Camera
- To initiate calibration, click the trigger on your Quest 2 controllers. After doing that, a big red cross should appear in the middle of your view.
- For the first click, move all the way up to your camera lens and align the middle of your controllers trigger with the red cross. Ideally you want to be touching the lens! Make sure your headset can see your controller while you’re doing this.
- You’ll have to repeat this process two more times but with each instance, the cross will appear smaller and at different positions on your screen. Make sure you move as far back as you can from your camera - until the distance indicator turns green - before clicking the trigger. Align the trigger with the middle of the red cross.
- Once you’ve finished, two virtual controllers should appear on top of your physical ones.
- Last step is to adjust the latency slider so that your virtual controllers “stick” to your real controllers and don’t lag behind. If your real controllers are behind your virtual controllers, increase the latency compensation!
- If you aren’t satisfied with the output, keep in mind that you can tinker with the calibration settings manually. Here's a short written guide by @Ragesaq.

4. Capturing in Mixed Reality
- Now that we’ve wrapped up the technical side of things, all that’s left is to start capturing. To do that, return to the compositor and click on ‘Capture’ and go to the Auto Tab.
- Next, select Beat Saber from the drop-down menu.
- Under ‘Target Resolution’, select the resolution at which you want your mixed reality feed.
- Then, click on ‘Sync & Launch’ to get the gears turning. If everything is as it should be, your mixed reality feed should show in the LIV output window.
Conclusion
And that’s pretty much it!
Once you’ve covered all the steps we have outlined, you should be all set. You can use your Oculus Quest 2 to record all the Beat Saber footage you want without breaking a sweat.
But if you run into any technical trouble or have any questions about VR capture on your Quest 2, feel free to hop into LIV’s Discord. They have a warm community filled with VR enthusiasts and you'll be sure to find help in the official support channels.